Category Archives: RPi System

Pi (7) RealVNC

Raspberry Pi に毎回 HDMI・キーボ・マウスをつなぐのが面倒、SSHはまた慣れてない、MacとかからGUIで触れるようにしたい。その場合RealVNCを利用という選択肢があります。

Raspbian OSにはVNCサーバ(RealVNC)が組み込まれていますが、既定では無効になっています。

VNCを有効にする

これを有効化すればVNCクライアントから接続できるようになります。

Raspberry Pi を起動してデスクトップ画面が表示されたら、メニューバー左端のラズベリーアイコンをクリックします。
表示されたプルダウンメニューから [設定]-[Raspberry Piの設定]をクリックします。

「Raspberry Piの設定」画面で「インタフェース」タブをクリックし、[VNC]の「有効」を選択してから[OK]ボタンをクリックします。

VNCビューアのインストール

RealVNCと互換性のあるVNCクライアントアプリを用意してください。

(macOSの場合、VNCクライアントなくでも、Finderから利用できます。)

Download VNC Viewer to the device

使用しているPCがMacの場合は、上記サイトを開いてから [macOS] アイコンをクリックしてください。
その後、画面中央の [DOWNLOAD VNC VIEWER]をクリックしてインストールイメージ(dmgファイル)をダウンロードします。

MacのFinderからVNCで接続するには
  1. 起動方法は簡単です。 Finderを起動して、メニューバーの「移動」ー「サーバへ接続」を選択します。 …
  2. サーバアドレスには「vpn://220.99.0.xx:ポート番号」の書式で入力します。 …
  3. 認証画面が表示されますので、VNCサーバで指定しているパスワードを入力します。

VNCビューアの起動

インストールされた「VNC Viewer」を起動します。
初期起動画面が表示されるので、そのまま[GOT IT]ボタンをクリックします。

ビューア画面が表示されたら、アドレス入力欄に Raspberry Pi のIPアドレスを入力して [enter]キーを押下します。

ログインユーザ名とパスワードを入力して [OK]ボタンをクリックします。


Pi (6) USB to PC (2)

USB を通して、 PCに接続する 2nd実験。

USBアダプターの購入

RaspberryのUSB Connector Expansion Boardが安く売っているので、導入することに。

「ラズパイzero w usb」の画像検索結果

接続実験

SB を通して、 PCに接続する 実験は、以前できたことで、ハードウェア繋ぐだけで動くはずだが、苦労した。

ラズパイZeroまたはZero WをUSBケーブル1本でPCやMacに接続する方法は、いつの間にうまくいかなくなった。

つまり、ssh pi@raspberrypi.local がうまく繋がらない。

Pi (5) USB to PC

Raspberry Pi Zero はWiFiもない、LANもないから、使いづらい。

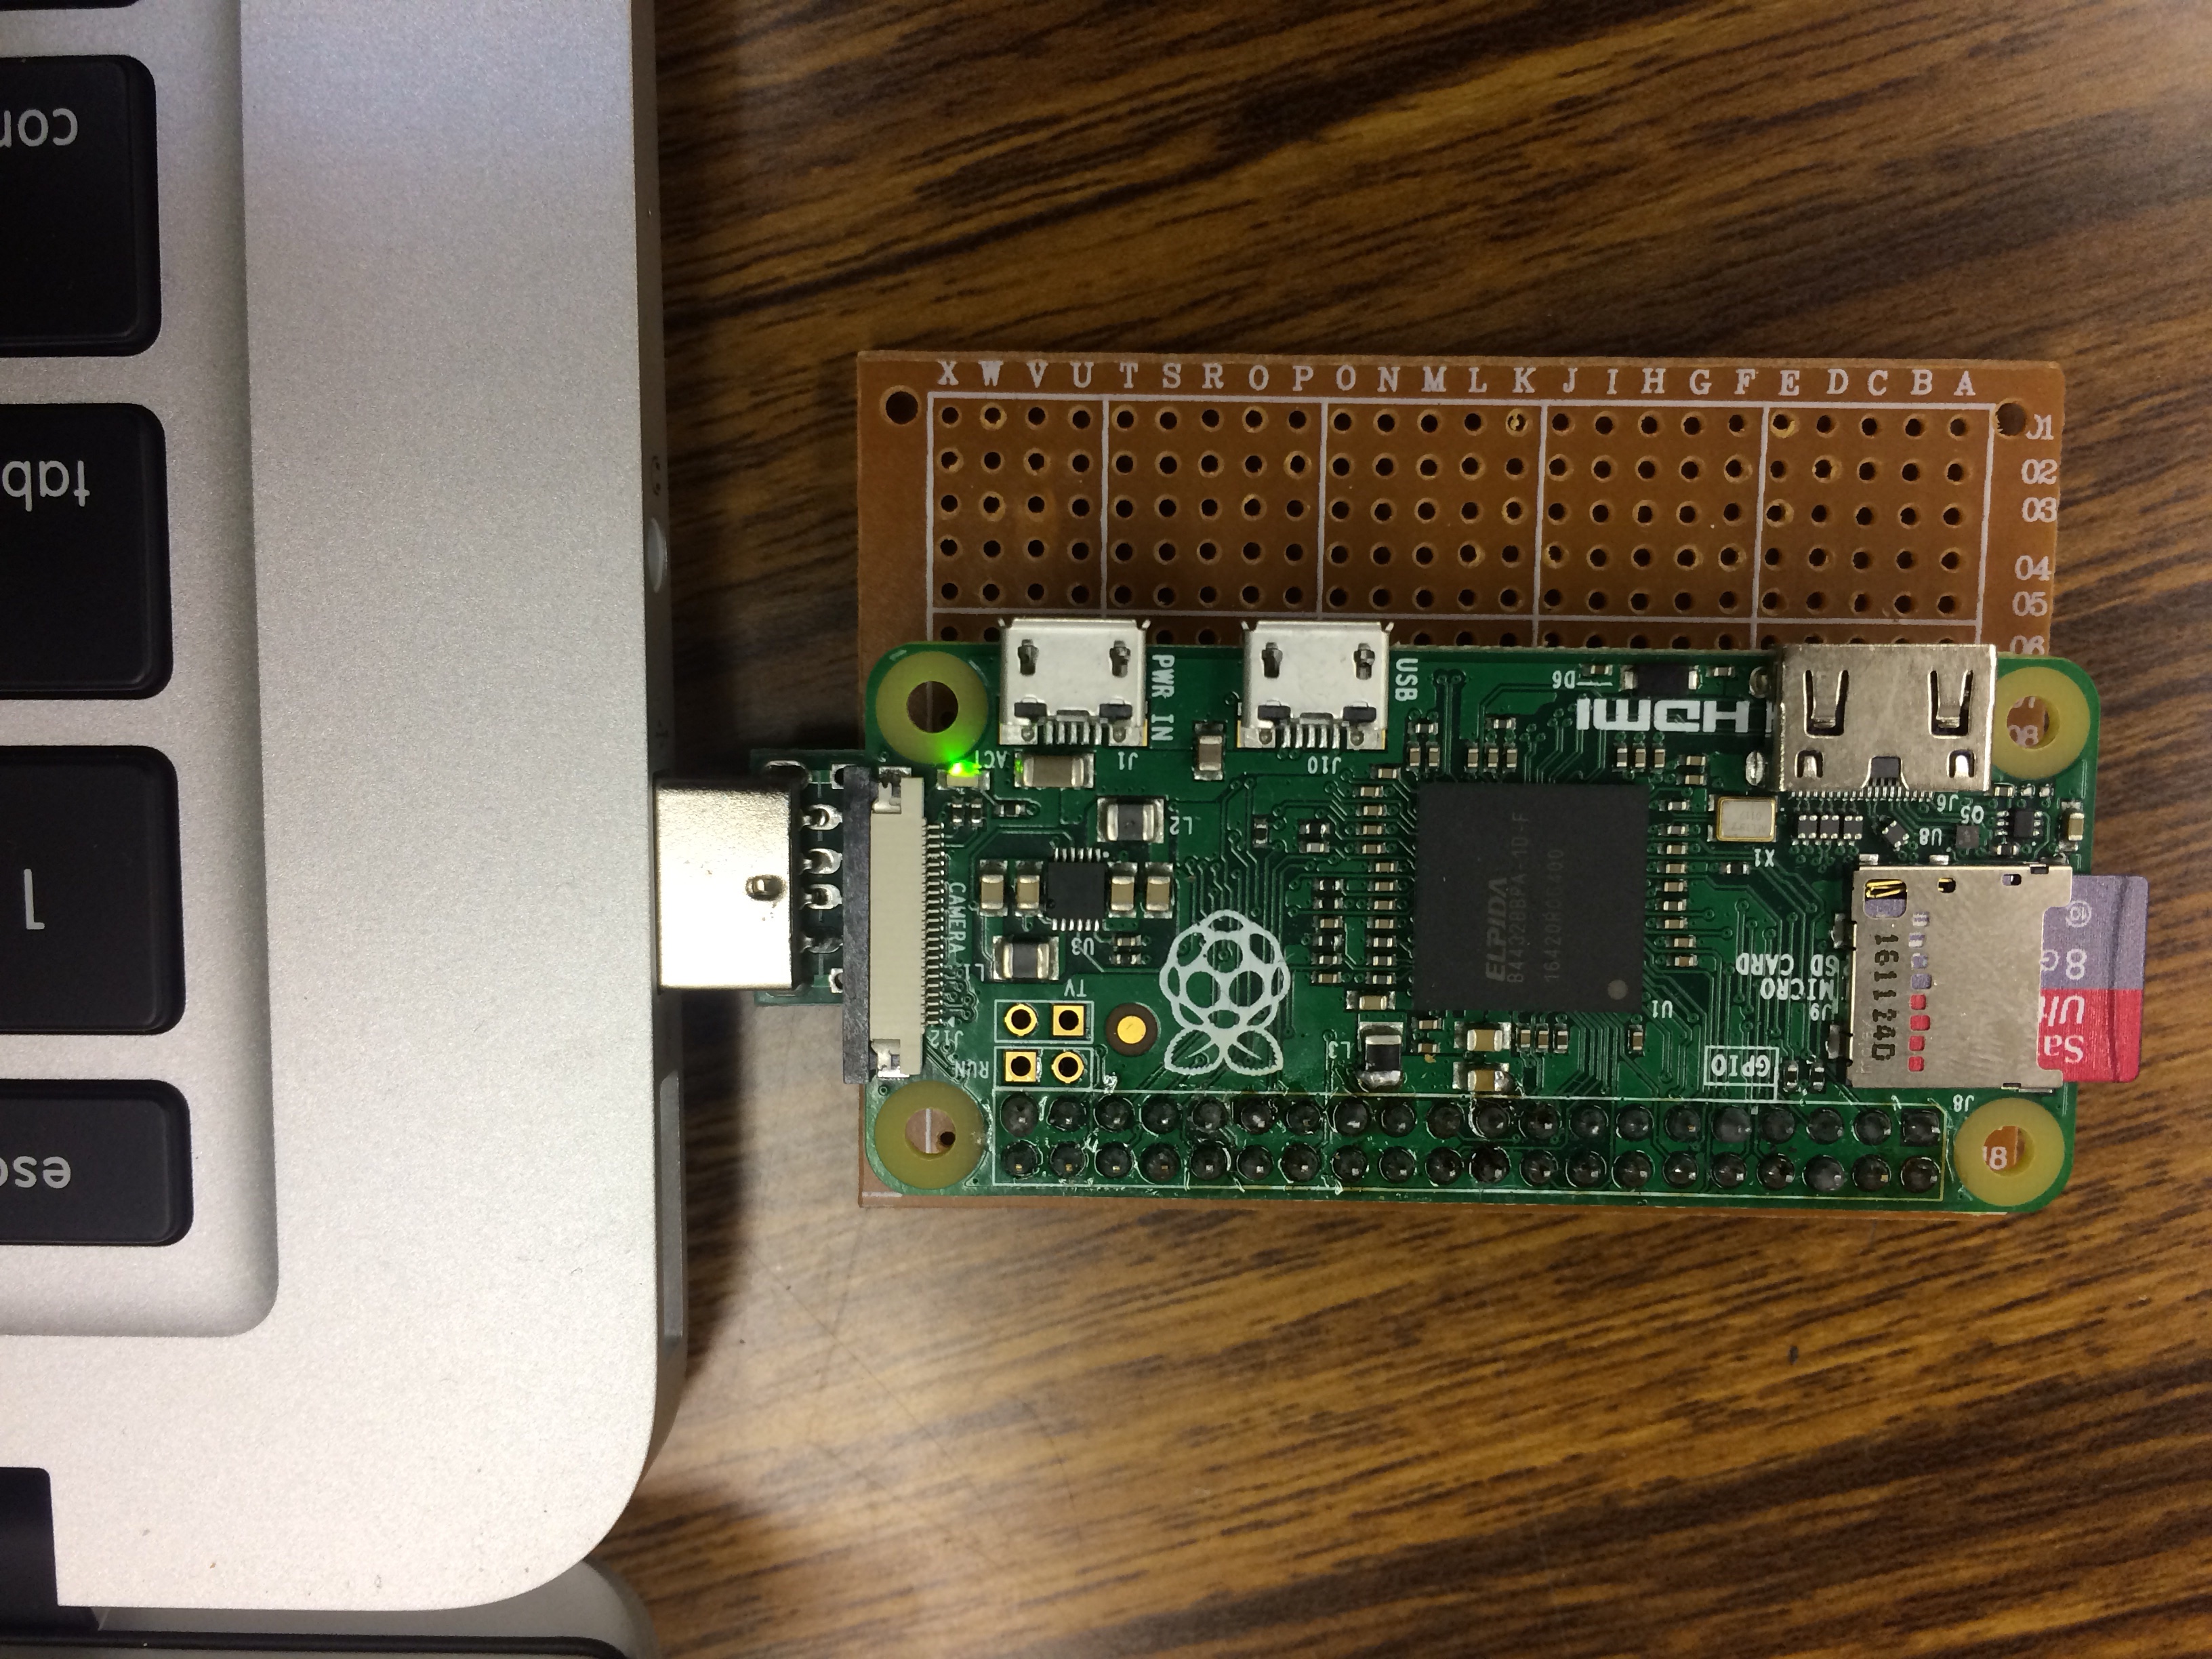
USBで直接PCに刺して使えるならいいと思い、やってみた。

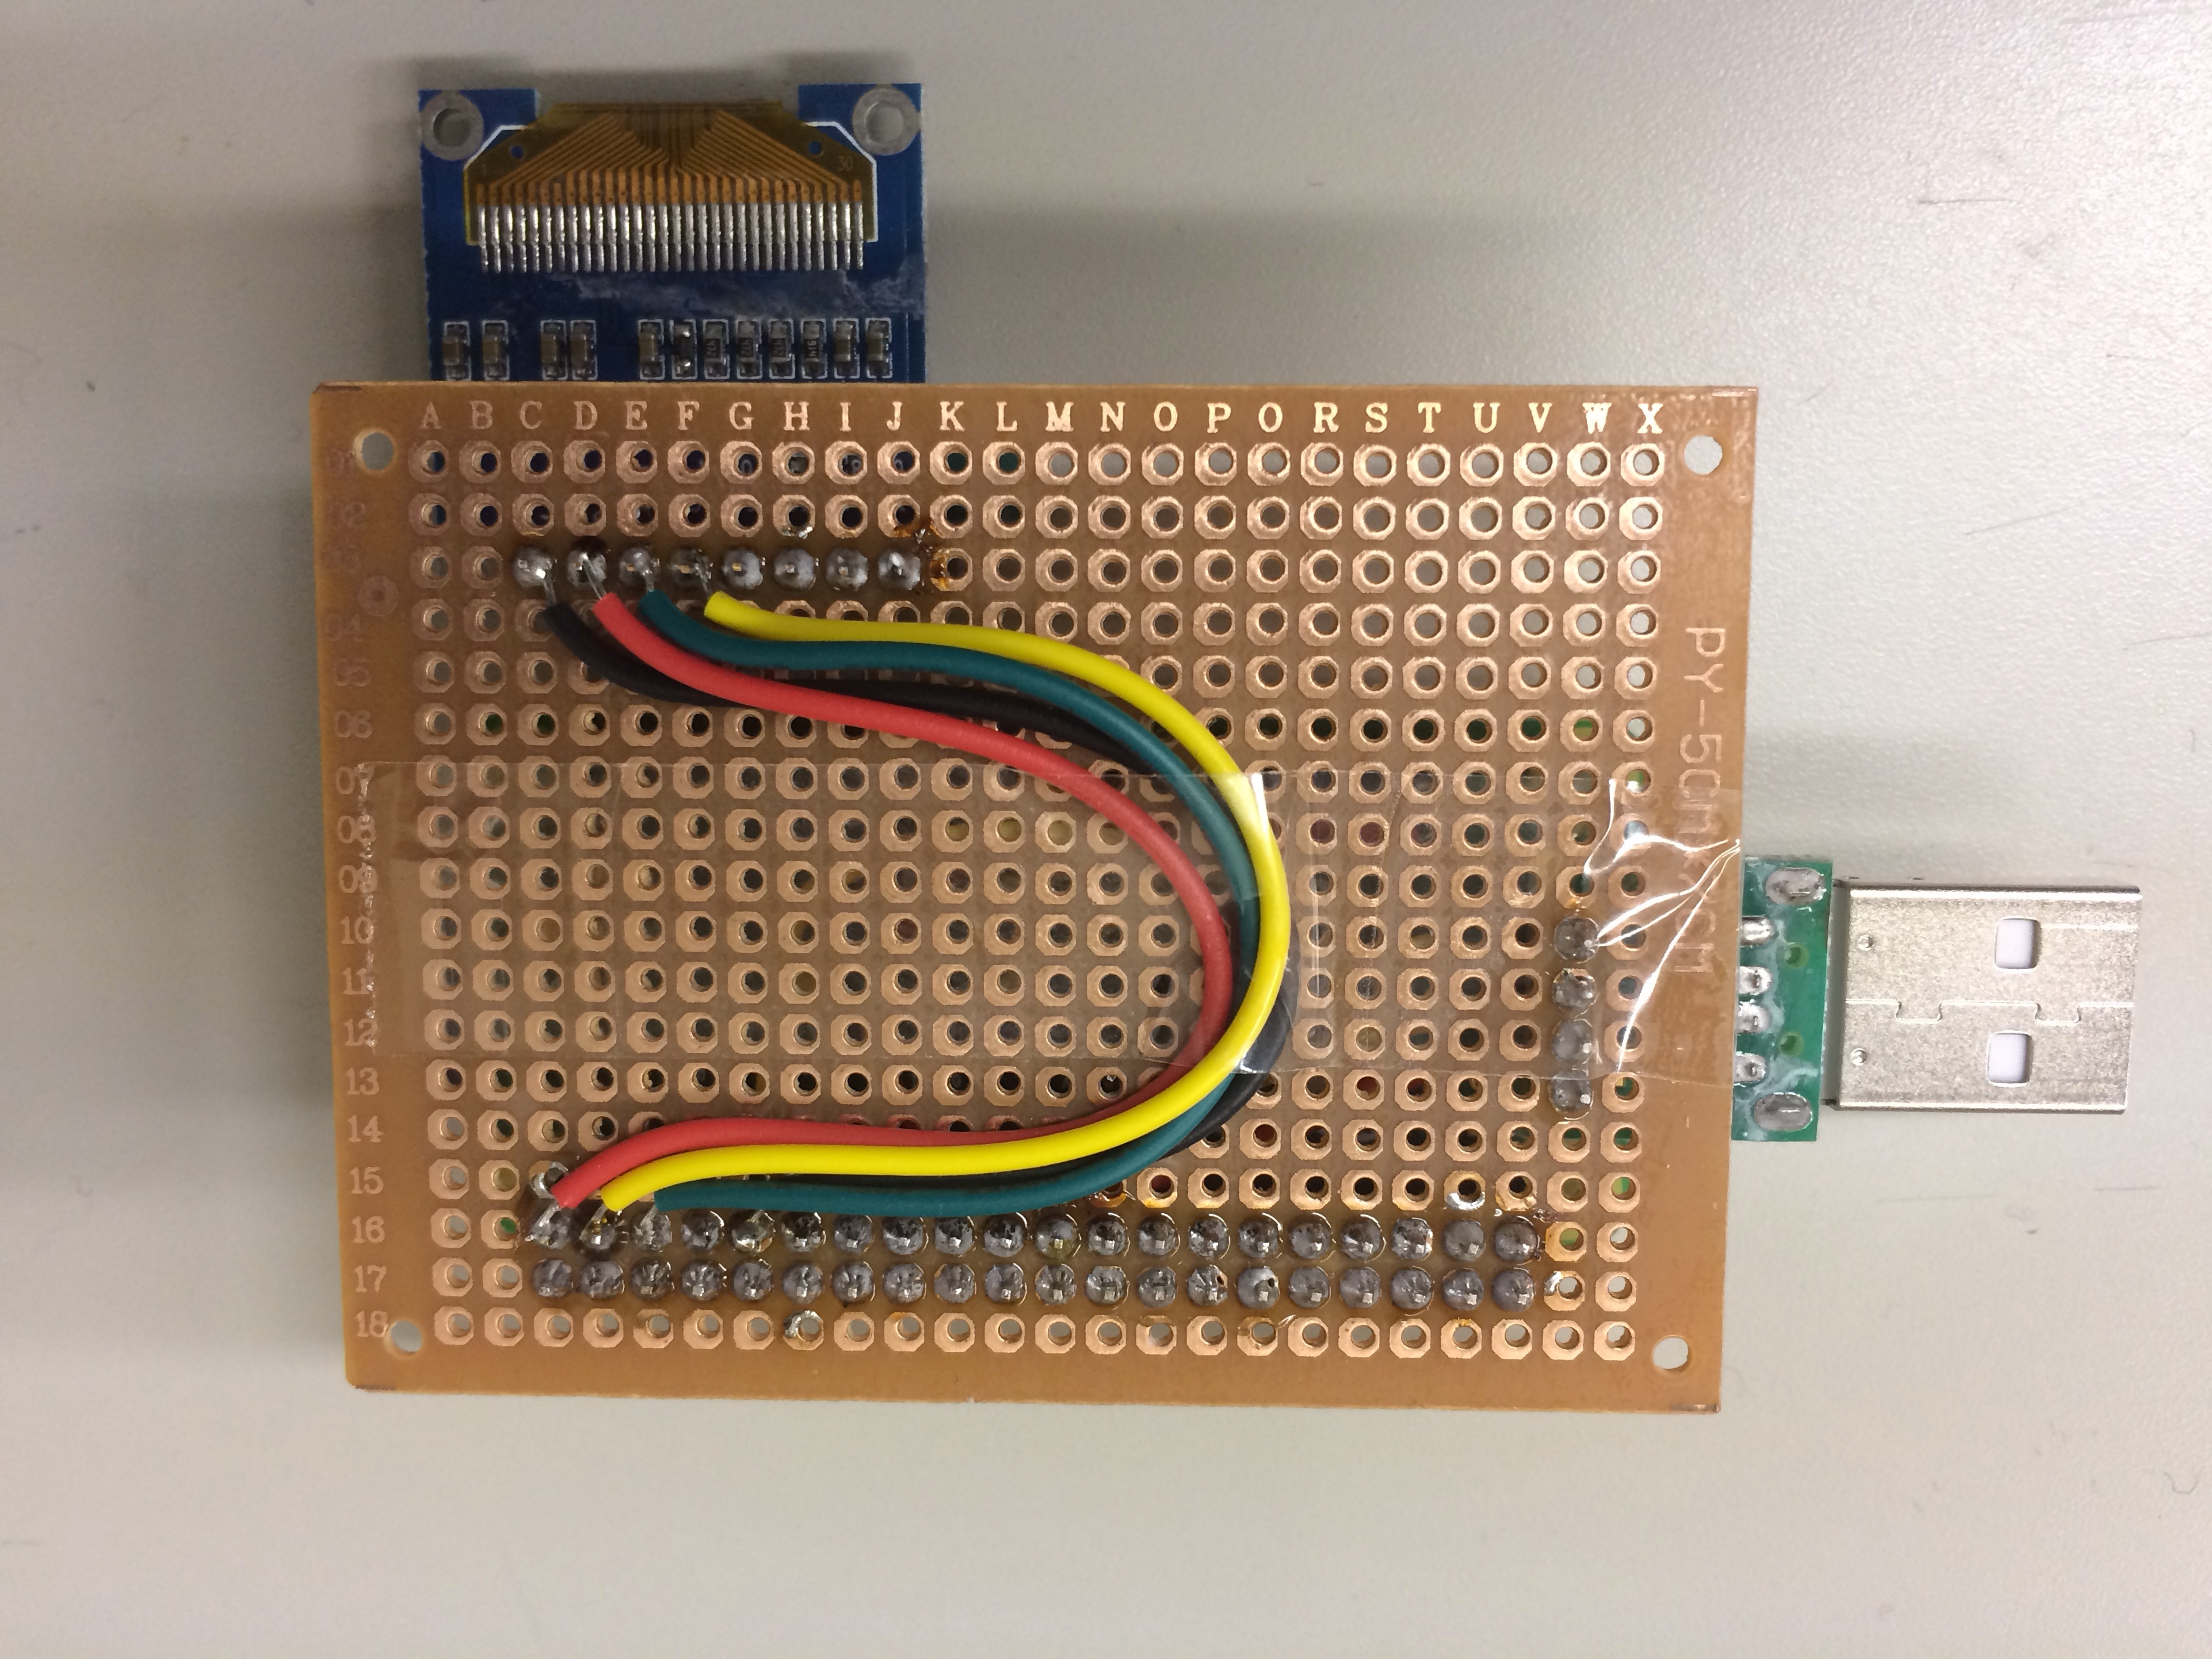
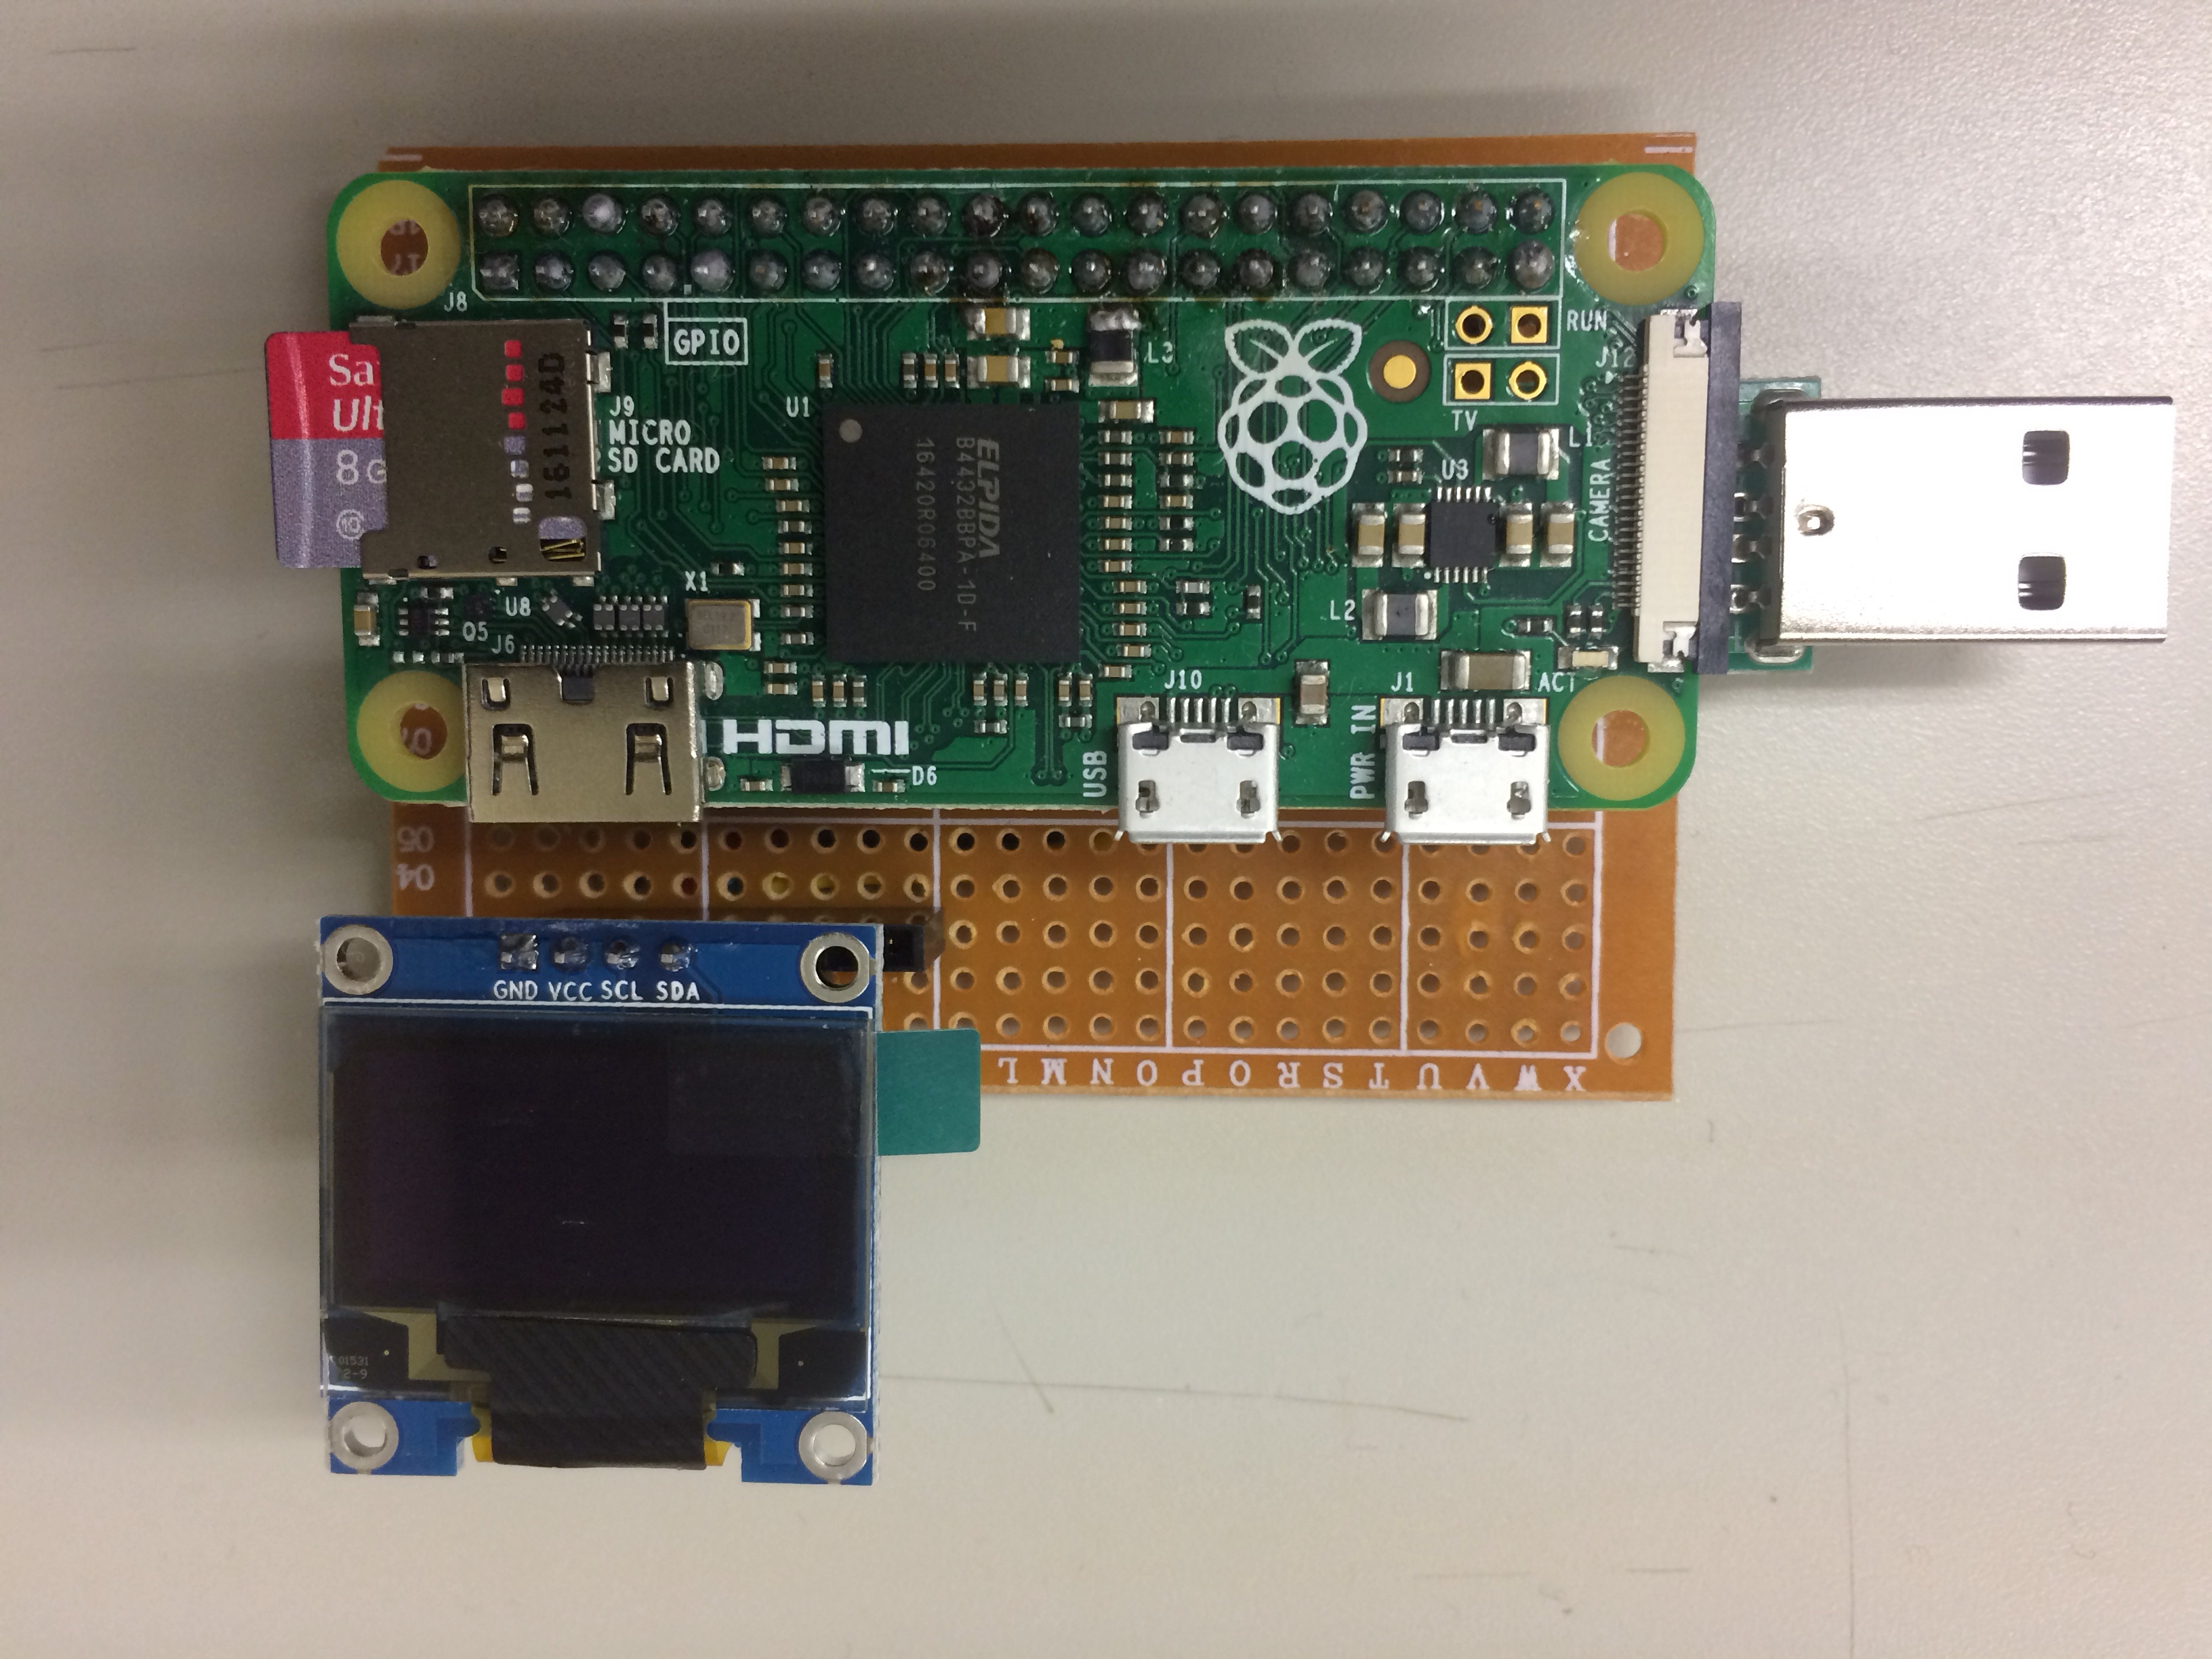
ハードウェア

ついてに、OLEDも繋げて、何かメッセージ見るとき便利。

完成した様子。

ソフトウェア

SDカードにRaspbianを書きこむ

いつもの方法

bootボリューム内の一部ファイルの修正

編集するファイルは3つ。

config.txt

次のコマンドでファイルを開く。

最終行に次の内容を追加。


cmdline.txt

次のコマンドでファイルを開く。

rootwaitquietの間にmodules-load=dwc2,g_etherを挿入。

編集後の内容は次のとおり。


ssh

現行のRaspbianは,デフォルトでsshによるログインが無効になっていて,モニタやキーボードを接続してローカルからログインする必要。でも,ファイル/boot/sshが存在すると,初回起動時にsshが有効になる。

以上の作業が終わったらMacからSDカードをアンマウントし,Zeroに挿入。

早速Macに繋いて動作確認。


Macのターミナルを起動し,次のコマンドでZeroにログインする。初期パスワードは”raspberry”。

ログインできたら、あとはLinuxとして自由に利用できる。

ネットワークに繋ぐには、Pi対応USB WiFi  ドングルを利用する。

参考

  1. http://blue-black.ink/?p=3674

Pi (4) LAMP setup

Raspberry PiにLAMP環境を作る

install

念のため、updateしておく。

pi@raspberrypi:~ $ sudo apt-get update

AMPを一気にinstallする
pi@raspberrypi:~ $ sudo apt-get install -y apache2 php5 mysql-server
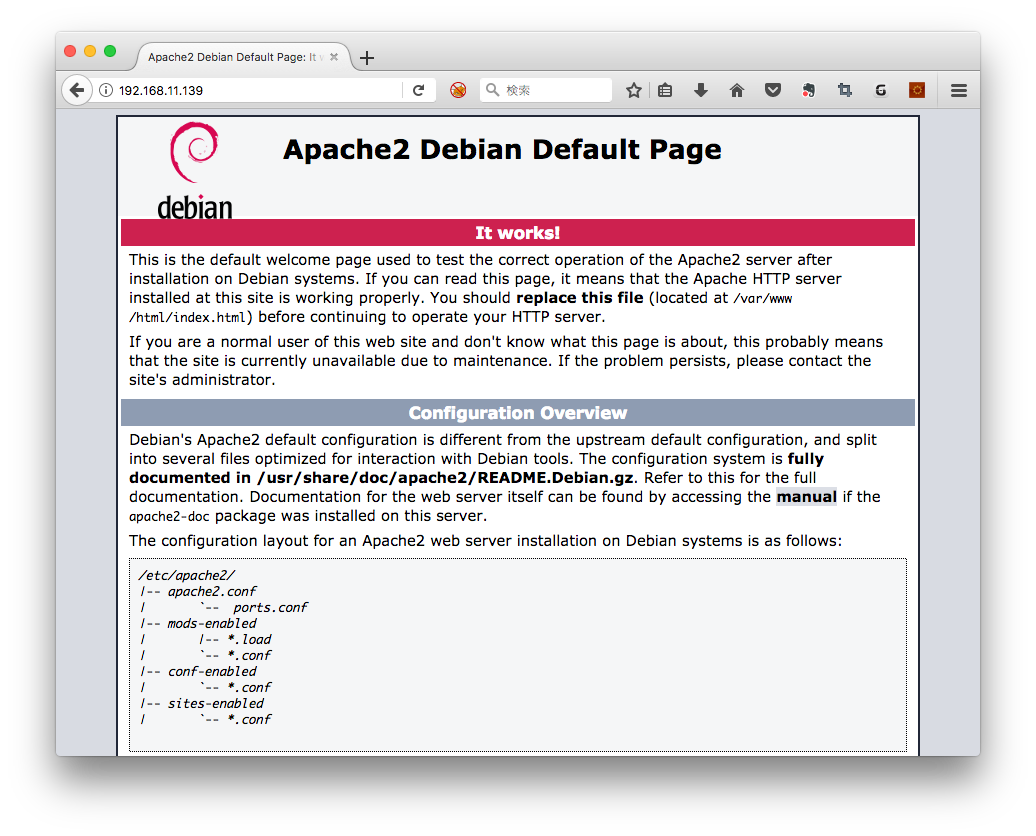
Apache2 Debian Default Page をみる
http://192.168.11.139/

PHP動作確認

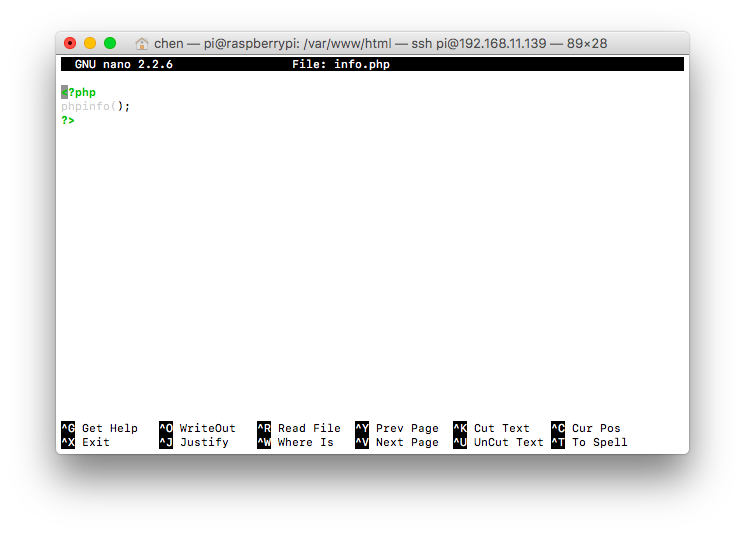
Document Rootsは、/var/www/html の下。そこにinfo.php ファイルを作って、PHP動作確認する。
pi@raspberrypi:~ $ cd /var/www/html
管理者権限で、ファイルを新規作成。
root@raspberrypi:/var/www/html$ sudo nano info.php
またはrootユーザーになって
root@raspberrypi:/var/www/html#  nano info.php

ファイルの中身を確認
root@raspberrypi:/var/www/html# cat info.php
<?php
phpinfo();
?>
ブラウザーから、PHPの設定情報が見れる。
http://192.168.11.139/info.php

Pi (3) Remote login

Raspberry Pi はIoT研究によく使われる機材。
Raspberry Pi の内部はLinux 動く、遠隔管理するため、LinuxのCUIで管理を行う。
ネットワーク接続した状態で、下記の作業へ進む。

ユーザー操作

ユーザuser1を対象とする。
ログイン、ログアウト、パスワード変更の他に、テキストファイルの作成、変更もよくあるので、テキストエディタviの基本操作を是非覚えてください。

ログイン

user1をipのサーバにログインとする。
$ ssh user1@ip
サーバの中身が入れ替わり、ログインできない場合、~.ssh/know_hostに該当する項目を削除してください。

ログアウト

$ logout

パスワード変更

$ passed user1

アドミン作業

SSHサーバーの有効化

  1. ターミナルで、設定ツールを起動
    $sudo raspi-config
  2. 8 Advanced Optionsを選択
  3. A4 SSHを選択
  4. [Enable]を選択
  5. 再起動を促されるので、再起動する

2016-11-25以降のISOイメージは、SSHはデフォルト無効にされた。SSH接続しようとしたがエラーとなる。
raspi-configで有効化するか、ブートパーテーションにsshという名のファイルを作るだけでもOK。

$ cd /boot
$ sudo touch ssh
$ sudo reboot

Terminal for Beginners Glossary

One of the great things about Linux is the terminal application. While it may look unfriendly and terse, if you want to really extend the capabilities of CHIP, you’ll often find yourself in the terminal. If you’re a beginner, here’s a quick reference of some really important and common commands. You can simply add -h to get some hints on how to use a command, such as cp -h or you can read a manual page using man cp. Most unix commands have a variety of options that can be executed in the command with flags, such as ls -l -a. Even better, search the internet! This primer is simply here to help you understand what a command might be doing, not to help you use it to its full ability.

  • cd change directory. open a folder. ex: cd ~/Pictures changes your current directory to the home Pictures folder, so you can easily access the files within.
  • mkdir make directory. create a folder. ex: mkdir Vacation makes a folder named Vacation in the current directory. mkdir ~/Pictures/Vacationmakes a Vacation folder in the home Pictures directory.
  • ls list files in the current directory so you know what is in it. Some options are ls -l to list in long format to provide information about permissions, size, and date. ls -a to show hidden files that start with the . character.
  • mv move a file from one directory to another, or to give it a new name. Ex: mv this.one that.one renames a file. mv this.one ~/Pictures/Vacation/ puts the file this.one into the Vacation directory.
  • cp copy a file from one place to another. Ex: cp this.one this_01.one will copy this.one to another file this_01.one. Add directories for more fun: cp ~/Pictures/Vacation/saturn.jpg /Users/otherone/Pictures/Vacation/saturn.jpg.
  • rm remove a file. delete it, and beware!. Use the -r to make it recursive to delete a directory. Ex: rm this.one deletes that file. rm -r ~/Pictures/Vacation to forget the good times.
  • sudo super user do. many commands need administrator-like privileges, otherwise they won’t work. apt-get is a command that needs to be run with sudo to allow files to be written to protected directories. You’ll see sudo as the first word in a lot of commands – all it is doing is giving the command the necessary access. You’ll be asked for a password the first time you use sudo. The default password and user is “chip”.
  • apt-get the command used for installing, removing, and finding software for Debian Linux systems, such as the CHIP Operating System. sudo apt-get install puredata installs the Pure Data program and any dependencies. sudo apt-get remove puredata will remove the program. sudo apt-cache search image will search apt repositories for the keyword search. And so on.
  • pwd present working directory. In case you forget where you are. Not much to it: pwd will output the directory name, such as /Users/home/chip/Pictures/Vacation/
  • grep a tool used for searching through files. It’s quite deep and can be complicated, but if you see the word grep in some command, you know it’s searching for a match.
  • | (pipe) a command used to redirect data into an application.
  • < (redirect) a command use to redirect data into a file.
  • cat and echo concactenate. append data to a file. Ex: echo "Last line of text" >> sometext.txt. Merge files: cat append.txt >> main.txtwill put all the text in append.txt into main.txt. Overwrite: echo "New contents of text file" > whatevs.txt will replace all text in the file with the text in quotes. Display text in file: cat showit.txt will print the contents in the terminal window. Create: cat > new.txt will let you create a new text file in the terminal by typing lines (ctl-c to exit).
  • less makes it so you can paginate and read a text tile. Ex: less longtext.txt will fill the screen with the first part of the longtext.txt file. Use the space bar to view the next page. Type q to exit.
  • nano a text editor. You’ll often see commands that call nano so you can edit a configuration. Ex: nano /etc/avahi/services/afpd.service to edit the avahi Apple file service file.
  • find look for files in the filesystem. Ex: find ~/Documents -name particular.txt -type f will look for the file with the name particular.txtin the Documents directory.
  • chmod change mode. Used for file permissions, which can be important when sharing things on the network, scripting actions, and many more reasons.
  • htop display the processes currently alive on the CPU. If things seem slow, or you want to see how much CPU or memory a program is using, just type htop to see a table of all running processes, then type q when you want to exit.
  • scp secure copy. copy a file from one computer to another over a network. Ex: scp Pictures/Vacation/motel.jpg Pictures/Vacation/accident.jpg chip@otherchip.local:~/Pictures copies a couple jpegs to another computer on the network.
  • ssh secure shell. access another computer on the network and use the terminal commands to make changes and control it. Ex: ssh chip@chip.local to access your CHIP on a local network.
  • CTRL C if you can’t use the terminal because a process is taking too long, type CTRL-C on your keyboard to cancel the most recent command.

参考:

  • http://net-newbie.com/linux/commands/vi.html – viエディタの使い方

Pi (2) Network Config

Raspberry Piホスト名変更

Raspberry Piのホスト名は、初期raspberrypiになり、一台以上のRaspberry Piを立ち上がると、Network上識別しつらい。
早速ホスト名変更しましょう。下記のコマンドで関連ファイルを開き、raspberrypiを好みの名前(例えばweatherstation)に変更しましょう。
$ sudo vi /etc/hosts
$ sudo vi /etc/hostname

有線LANをRaspberry Piに接続

有線LANある環境で行う。
LANケーブルを用意し、有線LANをRaspberry Piに接続する

固定IPにする:

sudo vi /etc/dhcpcd.conf

interface eth0
static ip_address=192.168.0.70/24
static routers=192.168.0.1
static domain_name_servers=192.168.0.1 8.8.8.8 fd51:42f8:caae:d92e::1

無線LAN子機をRaspberry Piに接続

無線LAN親機ある環境で行う。
Raspberry Pi3から、無線LAN内蔵になった。

Pi (1) Install

用意するもの

下記の品物を用意する。

  • Raspberry Pi 3+ Model B
    [amazonjs asin=”B07BFH96M3″ locale=”JP”]
  • microSDカード(16G, Class10)
    [amazonjs asin=”B07BHZMDHX” locale=”JP”]
  • マイクロタイプのUSBケーブル + 電源アダプタ
    [amazonjs asin=”B0748C6YBZ” locale=”JP”]

初期設定時に使用したもの

  • ディスプレイ(HDMI対応するもの)
  • HDMIケーブル
  • USB接続のキーボード
  • USB接続のマウス
  • Windows PC(microSDカードにインストーラをコピーする)

インストール

OS の起動ディスクの作成

OSはDebianをベースにした「Raspbian」をインストールすることにする。
インストーラのダウンロードは、こちら から行う。

NOOBS


ダウンロードしたzipファイルを展開し、ファイルをすべてSDカードにコピーする。

機器の接続

Raspberry Piにディスプレイなどを接続する。
接続するものは以下の通り
1. USBキーボード
2. USBマウス
3. HDMIケーブル(ディスプレイに接続)
4. microSDカード
5. LANケーブル(なくても良い)
6. マイクロタイプのUSBケーブル+電源アダプタ
(マイクロタイプのUSBケーブル+電源アダプタは最後につける)

Raspberry Pi起動 〜 OSインストール

  1. 電源ケーブルを接続すると、Raspberry Piが起動する。
  2. Raspbianにチェックを入れる。
  3. 下の方に言語と、キーボードを設定する箇所があるので日本語にしておく。
  4. Installをクリックする。
  5. 「本当にイメージを書き込んでもよいですか?この操作で既存の全てのデータは削除されます!」と確認がでるので
  6. 「はい」をクリックする
  7. Installが始まる
  8. Installが完了するまで少し待つ

Installが完了するとOSが起動する

セットアップ

ログイン

以下の初期ユーザ名:パスワードを入力し、ログインします。

ユーザ名 pi
パスワード raspberry


アドミン作業

アドミンの作業はユーザの追加と停止。
また機材の提案と購入作業もあるので、お薦め部品もリストする。
複数使う機材、またはインターネット上サービスを行う場合、ユーザの追加と、デフォルトユーザpiの停止が必要。

ユーザの追加

# adduser user1
# adduser user1 sudo

ユーザの停止

#

追加情報

SDカードフォーマット

OS書き込み後のSDカードは、パーティションが切られ、普通のパーティション削除はできなくなり、再インストールする際困る方が多いでしょう。
OS書き込み後のSDカードのフォーマットは、専用のツールが必要。
* SD Card Formatter – SD Association
https://www.sdcard.org/downloads/formatter_4/
使い方はインストールして、フォーマットするだけ。

機材の購入

機材を購入する場合、https://chenlab.net/amazon/ にお薦め部品も参照してください。
小型タッチパネルつきLCDを装着する様子

ディスプレイ付きPi-Top

参考書

[amazonjs asin=”480071138X” locale=”JP”]
サポートページ(正誤表・ダウンロード):
http://www.sotechsha.co.jp/sp/1138/